How to Add Banner Ad to your Project-Android.
The First Motto of the Project will be GAINING CUSTOMERS once there is a huge support of the Customers the Second Motto of App Development will be Earnings.One cannot simply develop any Application for free of cost for longer time.there should be some gain towards app development,One Such earnings is Ads.
Here i Used the Ad Which was Provided by Google Admob.One of the Famous Ad Provider in the Market.Let us see how we can add Ad to our Application.
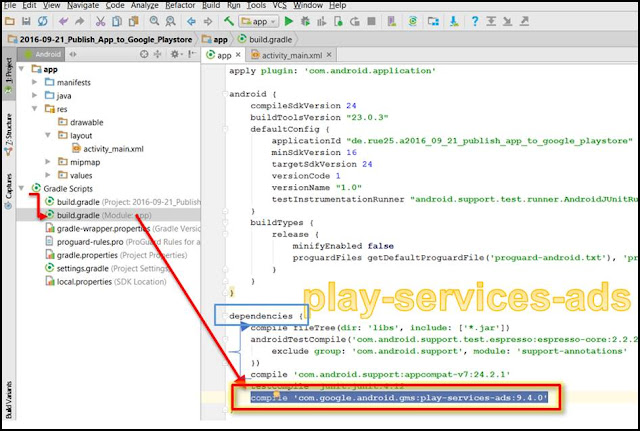
Open build.gradle and add play services dependency as AdMob requires it.
Add
compile ‘com.google.android.gms:play-services-ads:8.4.0’
Here I used 8.4.0 Version,Make sure that you use the Version Used for all other Dependencies.
Add the Ad unit IDs to your strings.xml. Open strings.xml located under res ⇒ values and add the ad units of Banner.
Here i Used the Ad Which was Provided by Google Admob.One of the Famous Ad Provider in the Market.Let us see how we can add Ad to our Application.
STEP-1)Create an Empty Project.
Create an Android Application with Empty Activity or Choose your Existing Application.STEP-2)Add Dependencies.
Open build.gradle and add play services dependency as AdMob requires it.
Add
compile ‘com.google.android.gms:play-services-ads:8.4.0’
Here I used 8.4.0 Version,Make sure that you use the Version Used for all other Dependencies.
STEP-3)Add Unit Id.
Add the Ad unit IDs to your strings.xml. Open strings.xml located under res ⇒ values and add the ad units of Banner.
<resources> <!-- AdMob ad unit IDs --> <string name="banner_home_footer">ca-app-pub-0664573200302260/332653322424</string>
</resources>
STEP-4)Add Permissions.
Open AndroidManifest.xml and add the below mentioned permission.Add INTERNET & ACCESS_NETWORK_STATE permissions. <uses-permission android:name="android.permission.INTERNET" />
STEP-5)Adding Banner Ad
Banner
 ads occupies only a portion of the screen. I am adding a banner ad in
my main activity aligning to bottom of the screen. In order to add the
banner ad, you need to add com.google.android.gms.ads.AdView element to your xml layout.
<com.google.android.gms.ads.AdView android:id="@+id/adView" android:layout_width="wrap_content" android:layout_height="wrap_content" ads:adSize="BANNER" ads:adUnitId="@string/banner_home_footer"> </com.google.android.gms.ads.AdView>
Step-6)Add Code in Java File .
Declare the Variable For the AdView As Fallows.It Will be as Belowprivate AdView mAdView;In OnCreate Method Add the Below Code as Fallows. mAdView= (AdView)findViewById(R.id.adView); AdRequest adRequest = new AdRequest.Builder().build(); mAdView.loadAd(adRequest);
Step-6)Run your Code.
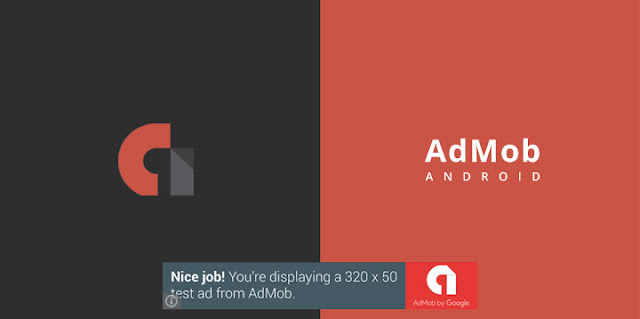
Step-6)Run your Code.Once you Run your code.The output will be as Below.
**Important
This can Produce the Test Ad provided by Google.This Id Can't Provide any Money.When you need Earn Need to use your Own Generated Id by Admob Website and replace it by your own admob id in the String.I will Explain In Upcoming Post.
Usage of Ad Id Generated by the Developer need not to be used When App Was Being Developed.It should be replaced to the Test Ad ID Only When the App is Ready to get Uploaded.
Thank you. 


Comments
Post a Comment