Splash Screen-Android
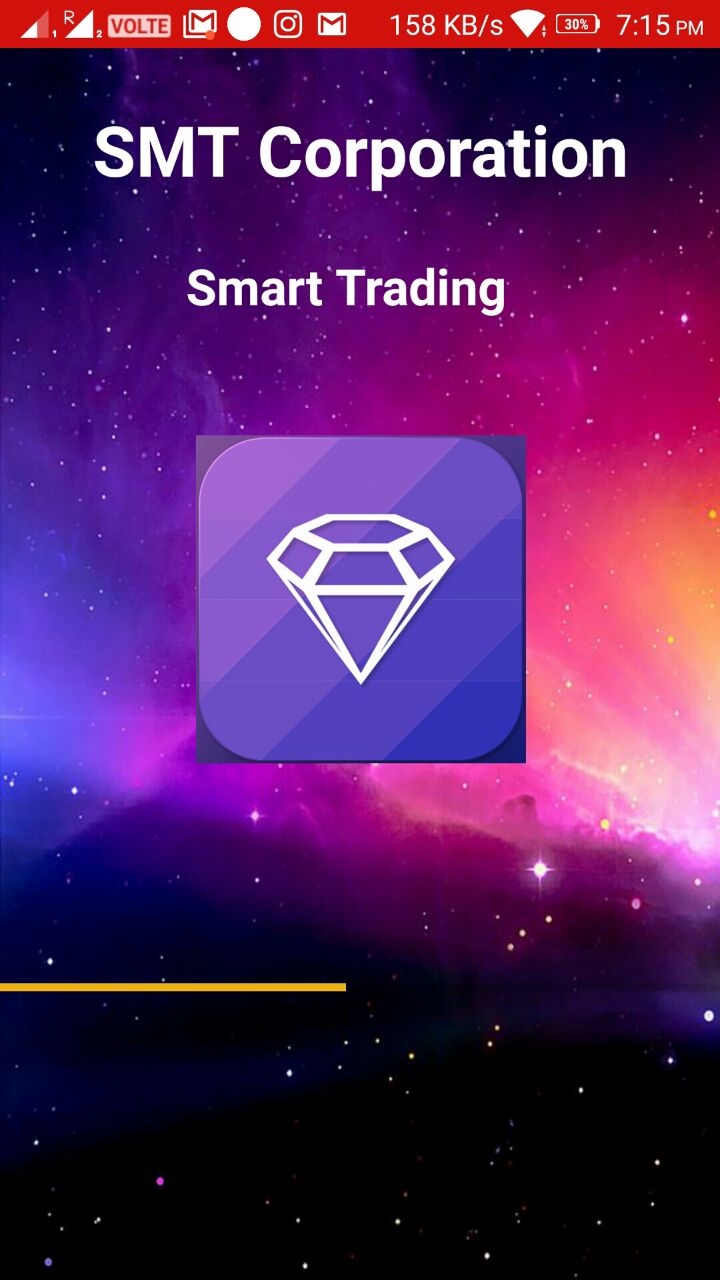
Splash Screen is the Initial Screen Which was displayed Whenever Your Application Starts.
This Screen is not Used to Perform any Kind of Activity.This Just Displays Some information About Application ,after Some time Depending on the Time Limit Set By the Developer This Activity Closes and New Activity gets Opens Up.
Let Us discuss the Creation of this Activity Brefily.
STEP-1)Create a New Android Project With Empty or Basic Activity which was explained in Before Tutorials.
STEP-2)Go To res->layout
STEP-3)Double click on activity_main.xml to open the Xml File
STEP-4)We have to Write XML code or Need to Drag and Drop the Elements from the side palette.
For the Above Screen.You can see It has Two TextView ,One ImageView and One Progress Bar.
As a Initial Developer You can Drag and Drop the Components from the Palette.
Giving Id to Every Component is Must.One Can Give Id to the Component in the Properties Panel which was located in Right of the Window.
You can see the ID at the top in the Above Window.
If your Components Shows Error while Drag and Drop,It means Your Activity in Constraint Layout.To remove This Error Just Press the Button which looks like + symbol which is located above the Activity Display
If you Doesn't Clear this Errors Your Components will Jump to the position(0,0)that is the Left top corner of your Activity.
Whenever your Layout is Different Then This Error Will not be induced. Example Relative Layout.
The HighLighted Symbol in the Above Picture.Removes all Errors.
STEP-4)Open MainActivity Java File Which is located as below
Initialize One Variable for ImageView and One Variable for ProgressBar.
Here We Doesn't create any variable for ImageView Because The ImageView Used Here not going to Change For Any circumstances.
Declare the Variables Above the Override Method OnCreate.
It looks like below
Now we have to Assign the Id to this Variable.Here id is What you given to the Component.
This Screen is not Used to Perform any Kind of Activity.This Just Displays Some information About Application ,after Some time Depending on the Time Limit Set By the Developer This Activity Closes and New Activity gets Opens Up.
Let Us discuss the Creation of this Activity Brefily.
STEP-1)Create a New Android Project With Empty or Basic Activity which was explained in Before Tutorials.
STEP-2)Go To res->layout
STEP-3)Double click on activity_main.xml to open the Xml File
STEP-4)We have to Write XML code or Need to Drag and Drop the Elements from the side palette.
For the Above Screen.You can see It has Two TextView ,One ImageView and One Progress Bar.
As a Initial Developer You can Drag and Drop the Components from the Palette.
Giving Id to Every Component is Must.One Can Give Id to the Component in the Properties Panel which was located in Right of the Window.
If your Components Shows Error while Drag and Drop,It means Your Activity in Constraint Layout.To remove This Error Just Press the Button which looks like + symbol which is located above the Activity Display
If you Doesn't Clear this Errors Your Components will Jump to the position(0,0)that is the Left top corner of your Activity.
Whenever your Layout is Different Then This Error Will not be induced. Example Relative Layout.
The HighLighted Symbol in the Above Picture.Removes all Errors.
STEP-4)Open MainActivity Java File Which is located as below
Initialize One Variable for ImageView and One Variable for ProgressBar.
Here We Doesn't create any variable for ImageView Because The ImageView Used Here not going to Change For Any circumstances.
Declare the Variables Above the Override Method OnCreate.
It looks like below
private ProgressBar mProgresbar;
protected boolean mbActive;
private ImageView imageView;
Now we have to Assign the Id to this Variable.Here id is What you given to the Component.
mProgresbar=(ProgressBar)findViewById(R.id.progressBar);
imageView=(ImageView)findViewById(R.id.imageView);
Here mProgresbar Represents the Variable Declared for ProgressBar above the Override Method.
Here R.id.progressBar Represents the Id given by Developer to the ProgressBar Component.
Here imageView Represents the Variable Declared for ImageView above the Override Method.Here R.id.imageView Represents the Id given by Developer to the ImageView Component.Inorder to make your ProgessBar Move from left to Right Use the Below Code.final Thread timerThread=new Thread() { @Override public void run() { mbActive=true; try { int waited=0; while (mbActive&&(waited<TIMER_RUNTIME)) { sleep(200); if(mbActive) { waited+=800; updateProgress(waited); } } } catch (InterruptedException e) { e.printStackTrace(); } finally { Intent myIntent = new Intent(MainActivity.this, dashBoard.class); MainActivity.this.startActivity(myIntent); finish(); } } }; timerThread.start();Here TIMER_RUNTIME is the Overall TIMER value.We have to Initialize this as Below,Above the Oveeride Methods.protected static final int TIMER_RUNTIME=10000;Here mbActive is the Boolean Variable Which is Used to Describe the ActivityInitialize this Variable above the Override Method as Below.protected boolean mbActive;The UpdateProgress(waited) is the Method Which You Should Create Below Your Oncreate Method as Below.
public void updateProgress(final int timePassed) { if(null!=mProgresbar) { final int progress=mProgresbar.getMax()*timePassed/TIMER_RUNTIME; mProgresbar.setProgress(progress); } }Here mProgressBar is the Variable declared and Initialized for the ProgressBar.The Actual Full Code Will Look like Below.package com.smt.asa.smartsmt; import android.content.Intent; import android.support.v7.app.AppCompatActivity; import android.os.Bundle; import android.util.Log; import android.view.animation.AnimationUtils; import android.widget.ImageView; import android.widget.ProgressBar; public class MainActivity extends AppCompatActivity { protected static final int TIMER_RUNTIME=10000; private ProgressBar mProgresbar; protected boolean mbActive; private ImageView imageView; @Override protected void onCreate(Bundle savedInstanceState) { super.onCreate(savedInstanceState); setContentView(R.layout.activity_main); mProgresbar=(ProgressBar)findViewById(R.id.progressBar); imageView=(ImageView)findViewById(R.id.imageView); final Thread timerThread=new Thread() { @Override public void run() { mbActive=true; try { int waited=0; while (mbActive&&(waited<TIMER_RUNTIME)) { sleep(200); if(mbActive) { waited+=800; updateProgress(waited); } } } catch (InterruptedException e) { e.printStackTrace(); } finally { Intent myIntent = new Intent(MainActivity.this, dashBoard.class); MainActivity.this.startActivity(myIntent); finish(); } } }; timerThread.start(); } public void updateProgress(final int timePassed) { if(null!=mProgresbar) { final int progress=mProgresbar.getMax()*timePassed/TIMER_RUNTIME; mProgresbar.setProgress(progress); } } }You can add or Change Font Colour and Background Color in theProperties Panel itself.In Next Tutorial I will Teach How to add Properties and Components through XML code.


Comments
Post a Comment